Thursday, June 3, 2010

Start with Objective C

This is the post purely for the persons who are newly starting with Objective C.
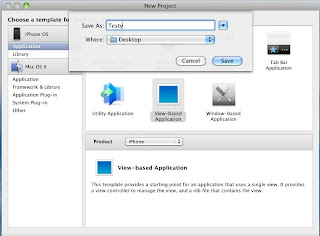
Step 01: Create a New project in Xcode.


Step 02: Select a template from Xcode (let us make View-based Application)


Step 03: Give the Project Name


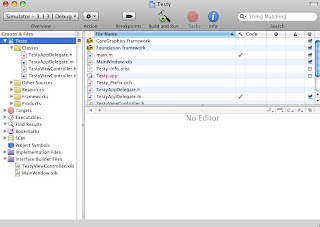
Step 04: The Solution could be opened with some files (.h, .m, .xib)


Step 05: Open Interface Builder by clicking .xib could lead you to View (Design) Page


Step 06: Open Library and (any) Inspector from Tool Bar


Step 07: Drag the component from Library to View.
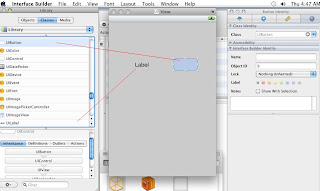


Step 08: Let us do a count increment and count decrement program on click of buttons.
Make sure you are declaring Outlets in TestViewController.
Add outlets by clicking the ‘+’ symbol on the window (can do lblCount in Outlets).


Step 09: Make sure you are declaring Actions in TestViewController.
Add actions by clicking the ‘+’ symbol on the window (can do CountIncrement, CountDecrement in Actions).


(or)

Declare the Outlet Names in .h file (TestyViewController.h), instead of Step 8 and 9.
#import
@interface TestyViewController : UIViewController {
// Declare Outlets
IBOutlet UILabel *lblCount;
}
// Declare Actions
-(IBAction)CountIncrement: (id)sender;
-(IBAction)CountDecrement: (id)sender;
@end

Step 10: Connect the Outlets and Received Actions from Connections of Inspector with Components which are available in View Window.
To do it, just drag the mouse pointer from the empty ring to corresponding component.
Empty ring could be filled, after the connection made.


Step 11: Go to TestyViewController.m for coding the Action.


#implementation “TestyViewController.h”
@implementation TestyViewController
int countValue = 0;
-(IBAction)CountIncrement: (id)sender {
countValue++;
[lblCount setText: [NSString stringWithFormat:@”%d”, countValue]];
}
-(IBAction)CountDecrement: (id)sender {
countValue--;
[lblCount setText: [NSString stringWithFormat:@”%d”, countValue]];
}

Step 12: Build and Run it. Perform the buttons to verify.


Wednesday, June 2, 2010

Testing on an actual ipad


1.Sign up for the Iphone developer program :
This is the first step towards testing your application on
a real device is to sign up for the Standard program.
2.Start your Xcode :
Choose window in X code(with sample program) ->Organizer to launch the organizer application ,then copy down the identifier obtained and save it,it will be needed later on.


3.Generating a certificate signing request

To request a development certificate from Apple, you need to generator a Certificate Signing Request.

Goto-Keychain Access, choose certificate Assistant and select Request a certificate from a certificate authority.


In the certificate assistant window, enter your email address, select the saved to disk radio button , and select the Let Me specify Key Pair Information check box,click continue.


After pressing continue will ask Key Pair Information
Choose a key size of 2048 bits and choose the RSA Algorithm.Click continue

You are asked to save the request to a file.Use the default name suggested and click save.
4.Logging in to the IPHONE DEVELOPER PROGRAM PORTAL

Choose iphone Provisioning portal


On the iphone developer program portal page,click
the launch assistant button


You should see the welcome page.Click continue.
First, you are asked to create an App ID.Enter a friendly name to describe the Apple ID.Click continue.

In Device ID, need to provide the device ID that you obtained earlier./
After generating,Click Continue…
5.Then Name your Provisioning Profile and it will create profile and download the generated provisioning profile onto your Mac by clicking the download button.

Drag and drop the downloaded provisioning profile.Doing so installs the provisioning profile onto your connected
pad.Click continue.
6.You can verify your provisioning certificate is installed correctly on your device by going to the Organizer application and viewing the provisioning certificate.

7.Back in the iphone developer program portal, you are now ready to download and install the Development Certificateonto your pad..
Double click the download certificate file that you have just download to install it on a key chain on your mac. When prompted click OK.

8. In the Key Chain access application, select the login key chain and look for the certificate named iphone developer your name.If you can see it, Your certificate installed correctly.
Now u almost ready to deploy the application.In Xcode change it to iphone device . BUILD and RUN.
10.Your application will now be deployed to the device.